Love those birds..............

The boy in our house loves blankets, especially fleece ones.  As he's grown, so has his phases.  He has had a Thomas the Tank one, Bob the Builder and Wall-E.  His newest love is Angry Birds.  But who doesn't, right?

So this year, instead of buying him one, I'm going to make it.  Here are the first two birds so far. The birds are made out of felt. I am then going to sew them on fleece squares. 


After getting started I regretted not doing this as a sew-along.  But I'm not so far along that you wouldn't be able to catch up pretty quick.  I made both of these appliques over the last two days. That includes searching down the pictures to use as a guide.

Anyone interested?  Just let me know.

Happy Crafting

FREE GIFT BOXES!!!


Do you need a last minute gift box? SVGCuts is giving away this FREE pattern for gifts boxes!  Just click on the Free Gift link on the left side here on my blog and it will take you to the download page.  


Happy Crafting!

This Smurf's for You!

It's been a while since I have joined any challenges. When I saw this challenge on PageMaps I knew immediately what I wanted to do.

Have you seen the Smurf movie yet?  It's very cute.  Be forewarned though. If you're sensitive about magic or spells, there is a LOT of it in this movie. I don't remember magic being a part of the original cartoon.

But here's my card for Becky's contest.  Hope you like it.


Aren't the Smurfs cute?  If you want the SVG file for them, I've included them in my Mediafire files.  Just click on the SVG Templates button on the left and it will take you the files.  Make sure to come back and leave a comment with a link to what you created with them.

As always, thanks for visiting!

Can we start fall a little earlier this year?

Yeah, yeah, I know.  It's only August.  But the Boy and I have started the school year and it has me in the mood for fall.  I can smell the gingerbread pumpkin cookies coming from the kitchen already................sigh.

And let's face it, I live in Florida.  The weather is going to be like this - well - probably until next January.  So I say let's start fall early this year!


Aren't these pumpkins cute? I just love them! And they were so easy to make.  They can be made either with a lid, like I did, or as a decoration. LOVE IT!

You can get the pattern FREE for a limited time at www.svgcuts.com.   They've also included a video to show just how easy these go together.

So go check them out and happy crafting!

Calling all Buggers!!!!

I'm so excited!  Consultants have been asking Close To My Heart for some type of punches or cutting system to coordinate with all the wonderful stamps.  Let's face it.  We're tired of cutting out all those shapes.


And boy, did they listen!!  


Introducing the exclusive Close To My Heart Cricut Art Philosophy cartridge!  This exclusive cartridge works with any of the Cricut Personal Electronic Cutter machine and contains 700 shapes with a touch of a button.  The exclusive images are extremely versatile and many are designed to be used with specific My Acrylix stamps in the new Fall/Winter CTMH Idea Book!
When you purchase the Cricut Art Philosophy cartridge you will ALSO receive 3 exclusive D size stamp sets (retail $17.95 each), designed to perfectly coordinate with images on the cartridge.  Also included are three 9 x 12 dimensional elements. Stamp on your cricut shape, cover your Dimensional Element with a Cricut shape, or cut, stamp and then cover!  Creating uniquely beautiful artwork has never been easier!  
Can it get any better than that?  Well, actually - YES!  Because when you order this incredible Cricut package, you will automatically qualify for the Stamp of the Month, Wicked for just $5! 
So don't wait! Just drop me a line and order yours today!!


I've been so busy lately....

....I haven't had a chance to post anything let alone craft much.  So I thought I'd share what I made for a couple of online spring contests.


After opening the card there is a cute little surprise on the inside.... bunny finger puppets!

To make the card base I used my Sure Cuts a Lot program to measure out a rectangle 7" x 10" .  I then aligned 3 holes at the 5 1/2" line. The holes are about 3/4" round.  After the base is cut, score it along the 5" line. This will give you a 5x7 card base with the 3 holes for the bunnies.

I then cut out felt in this shape and sewed them together to make the finger puppets.


It was my daughter's idea to glue on the wiggle eyes.  It was a nice touch.

As always, thanks for stopping by and leave some love so I know you were here.

Till next time...............................

Krafty, Kool & Kolorful!


Learn how to use these awesome accents that come with the Miracle Workshop on the Go!

Just So Beautiful!!!!

Of course I'm talking about the two cuties in the layout. But I'm very biased where they're concerned.

But Wings Workshop On The Go from this month's Crafters 10! is beautiful too! As soon as I opened this kit and saw the incredibly rich and bold colors, I knew exactly what picture I was going to use. I was also excited for all of the little surprises in the kit.  Check out the little button brads I used in the middle of the flowers. Aren't they awesome?!!  There were so many "extras" in this kit and I can't wait to play with them all.

Another wonderful surprise was using the spray pen. The picture of the layout just couldn't capture the awesome affect of this spray pen. It has a pearl shimmery shine to it that's just so wonderful. I love it. Wondering how it's done? Make sure to check out the video on the Crafters 10! blog page!

The birdcage, swirls and flowers were made using the Cricut cartridge Serenade and the butterflies are from the cartridge Bloom.  I added extra dimension by inking the edges with coordinating CTMH inks.


 I loved how the accents turned out so much that I just had to make another one for a card.


The roses. little blue flowers and leaves were made using a pattern cut out with the Cricut and SCAL.  Again, I inked the edges with coordinating CTMH inks.

It's not too late to order this incredibly beautiful Wings WOTG kit. Just follow this link to Crafters 10!  And keep a lookout for our next awesome kit and How-To video coming in March.

Thanks for playing along and happy crafting!

Birds the Word................

Owls must be the new "in" thing. I'm seeing them everywhere! Which is okay because they are so cute.  I recently came across a blog where a fabulously crafty mom had made some owl pillows for her daughter's party. I just had to give them a try!

Fortunately I have an incredible husband with some mad computer skills.  He helped me design a pattern, we printed it and got started.  So here's what we came up with -


So what do you think? Cute huh?

If you haven't stopped by Crafter's 10! (link at top) than please come do a fly-by!  There's still plenty of time to play along. And our first give away is an awesome one! Ready for this? A Cricut Cartridge!!!  But you have to play along to enter!!!


Thanks for stopping by and  happy crafting!!

I've been overlooking things.........

If you've been following my blog then you know how much I love SCAL (Sure Cuts a Lot).  One of the reasons I use it so often is because I love the 3-dimensional look I can get with the paper piecing. But after a fantastic sale of Cricut cartridges for just $9.99, I couldn't pass a sale like that up.  It made me take a second look at the Cricut cartridges I had. And instantly I started seeing all kinds of possibilities.

I made the fuschia for this card using the Accent Essentials cartridge.


I have always had a love of fuschia. My first full-time job was at a B&B in California while I was in college. It had fuschia hanging from all the balconies and it was just so beautiful.

Okay, so how did I make the flowers? The patterns from Accent Essentials I used are listed as

* Accnt6S/Blackout @ 1" in green
* Accnt31S @ 2" in purple
* Accnt33S @ 3" in red
* Accnt35S @ 3" in red


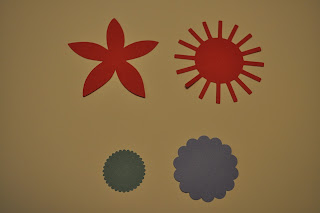
The next step is to ink the edges. You'll then want to cut out the center of the scallop shape and the sun-looking shape.


Now you'll want to roll the "sun" and the scallop.  It's easiest to do using tweezers.


Glue the end of the "sun" piece. Then you will glue this into the middle of the curled scallop piece.


Curl the leaves of the flower back with a bone folder.


Glue the inside piece to the center of the flower. Turn the flower over, and glue the green piece to the back.


And there you have it. A beautiful fuschia! Fuschia plants have very thin stems, which is why they hang down the way they do.


I hope you have as much fun with this as I did.  I'd love to see what you come up with so leave me a comment with a link to your work!

And lastly, it's not too late to join me for February's Crafters 10! WOTG. For details, just click on the Crafters 10! link on the top of this page.

Hope you have a great weekend and happy crafting!!

I Love Monthly Clubs!

Monthly clubs can be so fun!  Not only do you receive really fun and exciting products, but they can give you some great ideas as well.  Sometimes when I'm in the mood to craft, but don't want to do too much thinking, it's nice to be able to pull out a kit, follow the directions and enjoy the beautiful results!

Do you like creative kits? Interested in a monthly club but don't want the commitment? Do you like getting free products? Do you like learning new techniques and projects? How about all of this delivered right to your doorstep?

If you answered yes, than Crafters 10! is the club for you!!

For only $29.95 (plus tax and shipping) you will receive a new Close To My Heart Workshop on the Go delivered right to your door each month.

Each kit includes:

1- CTMH Level 2 Paper Pack
1- Exclusive B-size CTMH My Acrylix Clear Stamp Set
1- Coordinating Accessory Pack
1- Full color instruction brochure.

Check out these cards & scrapbooking layouts made with these fabulous Close To My Heart products.


What you'll receive -

* Awesome products at a great discount!
* A free Idea Book
* Free technique or project each month
* An exclusive stamp set available only through the monthly kits
* Opportunity to win free product!
* Receive the Stamp of the Month at a great discount or even free!


Each kit includes a brochure with instructions to complete a combination of projects. You can make 2 two-page layouts or 12 cards or a combination of both, a 2 page layout and cards. By simply adding a few pieces of card stock you can make even more. As an added bonus, I will be posting a new technique or project each month right here on my blog!

And there's no monthly commitment!  Buy only the kits you like!

And I've saved the best for last -

* When we've reached 10 Club Members each month, all club members' names will be entered into a drawing to receive either free product, a gift card, or even next month's kit free!!
* Send me a picture of what you've created with that month's kit and you'll double your chances in the drawing!!
* Refer a friend who joins the club, and you'll triple your chances!

Extra Details -

* Each month I will send you an email with the link to place your Crafters 10! club order.
* Kit orders must be placed by the 10th of each month.
* Orders are shipped right to your door via FedEx. After your order is placed you will receive a FedEx tracking number for your convenience.
* During any given month you may add to your order from the Ez-Invite order form.  All orders over $100 qualify you for a FREE Stamp of the Month!

So are you in? To check out our first Crafters 10! Club Workshop on the Go, visit me at Crafters 10! or go to the tab at the top of this blog. I'm so excited and I hope you are too.  So let's get together and get crafting!!